A Peek Inside My Teaching Team's Task Tracker
TLDR: This post is a behind-the-scenes look at a task tracker I’ve developed over years of managing teaching teams (from 3 to 36 teaching assistants). I share examples of the task lists we use each semester, plus templates for modules, exams, and weekly tasks. You’ll also get insight into how I design the tracker to streamline work and support my team.
I’ve written two blog posts about how I track tasks: my to-do lists and my teaching team’s to-do lists. But both are kind of abstract. I write about the things that go into them, but no concrete details. And I did this because I didn’t want to presume others’ contexts. However, that abstractness never fully sat well with me because, when it comes to learning, sometimes concrete examples or case studies are essential.
So, this blog post introduces an example course teaching staff task tracker in a Trello board.
This post is an experiment to see if people find a concrete example like this useful. I’ve copied many of the cards and lists from my teaching team’s Trello board and removed as much course-specific content as seemed reasonable. Sometimes, instead of a full removal, I left placeholders to make it clear what goes in there without bogging you all down with the details of things like what autograder or learning management system (LMS) I use and exactly how I configure them. There are also spots that say “Professor:” which more just means this is something the instructor of the course should do, such as deciding on the updates for the assignment.
As for how to approach the example task tracker, I think it depends on your context. If you are new to any task management system, I do not recommend copying and using the board wholesale. Instead, look through it and find the pieces that you can imagine using and put them into a task manager of your choice (which could just be a Google Doc!). If you are a veteran task manager but not for a team, copying the board might make sense. But a wholesale copy mainly makes sense if a majority of the cards seem useful to you and you will likely just be tweaking some of them (less work than a lot of copy-single-card clicking). Otherwise, I recommend copying piecemeal.
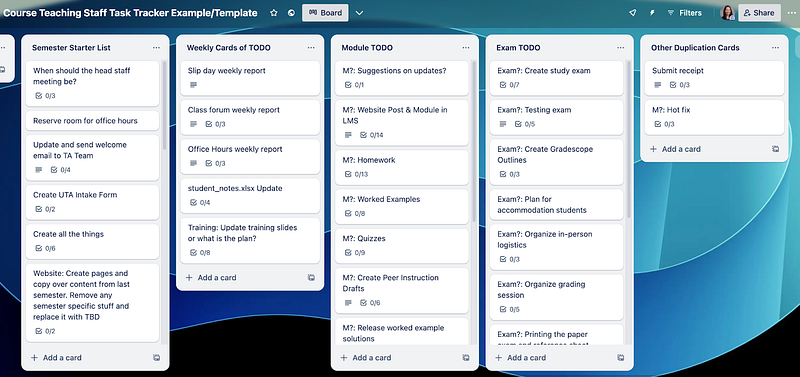
List Overview
The board is laid out pretty much exactly how I start the semester, and before I hand it to my teaching team. Here’s what each one is for:
- Reference — All information that hasn’t found a home in our other documentation or is specific to that semester. For example, the UTA food budget is in flux right now, so I put that info here and called the card “Food budget.”
- Semester Starter List — Cards for semester planning and setup, primarily focusing on pre-semester preparation and the first two weeks (add/drop period), plus critical mid-semester checkpoints and semester close-out tasks.
- Future — All cards that are not in the Current list, but we know they will need to be done at some point.
- Current — All cards that can be worked on and/or due in the next two weeks.
- Done week of TODO — Holds completed cards, labeled with the current week’s date (e.g., “Done Week of 5/16”). Each week, this list is moved to the end of the board, and a new empty list is created.
- Buffer — An empty list separating the main lists from the duplicate cards and the done lists. It makes it visually easier to see what to focus on.
- Weekly Cards of TODO — Template cards duplicated each week for recurring tasks like student progress reports, notes spreadsheet updates, and weekly discussion items (e.g., UTA training).
- Module TODO — This course is organized around modules. These are all the cards associated with the entire life cycle of a module, including updating, creating, and deploying content, as well as grading.
- Exam TODO — This list is similar to modules, but is for the exam life cycle.
- Other Duplication Cards — Template cards for irregular or one-off tasks without a fixed schedule. Examples include procedural tasks like receipt submission that require consistent instructions but occur sporadically.
Preparing the board for the start of the semester
Now that you understand what each list represents, let’s get practical. Here’s exactly how I set up the board before each semester begins:
- Add all needed TAs to the board.
- For each card in the “Semester Starter List”:
- Add due dates
- Assign someone to the card if it’s clear who is responsible for that task
- For each card in the template lists: Assign someone if they are the primary person (including myself) in charge of that task or the person who would be the initial person responsible
- Copy the template lists for the initial modules that need to be ready and for the first exam.
- Do as many of my cards as I can so I’m not blocking any of my TAs.
- Notify the TAs who know the Trello system that their cards are ready for them and tell the others that we’ll go over it at the first meeting.
Checklist or Card? Deciding how to structure things
Once you start trying to tweak my example board or start working on our own, you’ll likely face a dilemma: Should I put this thing in a checklist or create a card for it? To be honest, this is partially up to taste and is more of a spectrum than a cut-and-dry dichotomy. I also am not consistent about it. You may find some cards/checklists that don’t make sense, and potentially it’s like that because that’s how I’ve always done it, rather than it actually making sense. Generally, here is my philosophy:
A card represents a “thing” we want to make sure gets done. It generally falls under three categories:
Task
Responsibility
Project

I mainly have two kinds of checklists:
Steps to follow

This kind of checklist ensures that tasks are fully completed and no important steps, however small, are forgotten. This is especially helpful when a TA needs to follow a sequence of actions every time, such as clicking the right buttons to publish all parts of a module.
A sequence of events

This checklist lays out a clear sequence of things marked with who’s responsible (or, as in the screenshot, what I’m responsible for). Unlike cards, which can appear in any order, a checklist enforces a single flow, making it obvious what’s been done and what (or who) is blocking the next step.
So, given this philosophy, the workflow for a big “project” usually gets broken up into multiple cards with a mix of task, responsibility, and project cards. Checklists are potentially in any and all of these cards.
A concrete example is the Module template list. Almost all of the cards have checklists of varying lengths.
- “No checklist” — Release worked examples solutions — This actually kind of does have a checklist of steps in the description. It’s just that marking each step as completed seemed tedious.
- One item checklist — Suggestions on updates? — This has a single item to remind the TA how to approach that card and of a step I want them to do. So I require them to check it off as evidence that they did it.
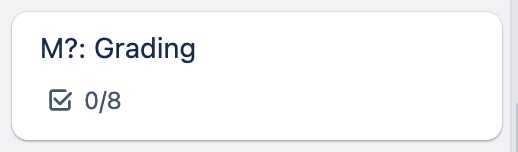
- Responsibility checklist — Grading — This is a responsibility card with some extra guidance to the TA, so what to do is explicit/not only in my head when I onboard a new TA.
- Project checklist — Homework — This is a project card where responsibility gets passed around. The sequence of events checklist screenshot shows the initial part of this checklist. The card starts assigned to me, and includes whoever is in charge of that homework (so I don’t have to remember who to add when I’m done with my part). The first checklist item is marked as mine, and I don’t check it off until I’m done. This checklist item is a way to signal to the TA that I am blocking them until it is checked off.
Conclusion
So, was this helpful? If the idea of task trackers feels overwhelming, feel free to check out my earlier blog posts (my to-do lists and my teaching team’s to-do lists). My hope is that this post provides some concrete examples to help you figure out what might work for you.
If you’re new to task trackers, again, I don’t recommend copying everything wholesale. Instead, think of this as a “coffee table book,” something to browse for inspiration. Pick out the pieces that resonate and adapt them to your needs. If you’re already a task-tracking veteran, do whatever works best for you.
I hope you enjoy digging through the product of many hours (and years!) of working with a TA team, and that you find a few gems to make your own process smoother. If you have thoughts or questions, drop me a comment below! I’m happy to discuss more.
Comments
Post a Comment